I have been interested in making bread ever since the
children  ere small and we used to holiday in France. There the bread was so
fresh and crusty! When we came home from one particular holiday to the ‘cardboard
loaf’ I decided to buy no more and make my own bread. I used to buy sacks of
flour and store it in our caravan and I fresh yeast was purchased by the kilo.
Since then, the supermarkets have improved breadmaking in
this country, often having their own ‘instore bakeries’. Our children have flown
the nest and I no longer bake bread. However I made one special loaf this
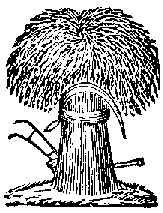
weekend. I fulfilled an ambition. I’ve made a Harvest Sheaf using a recipe from a
book I bought when I was about 35 years old. This ambition has taken a long time
to come to fruition!!
The sheaf uses a very plain bread dough, which is low in
fat. The basic shape of the sheaf is a keyhole measuring 14" x approximately 15".
That was the first problem to overcome. What could I bake it in? I used my
oven-wide sunken grill pan with the wire top taken out. The rolled keyhole-shaped
dough is brushed liberally with egg wash to ‘stick’ the wheat ears and stalks to
the base. There were 20 stalks rolled into long sausage shapes stuck to the
bottom half. Then a plait was added to divide the stalks from the wheat ears with
a bow in the middle. The wheat was very fiddly to make. The dough was rolled out
and cut into diamond shapes with a knife about 1˝" long and then several cuts
were made into the dough with scissors to give inverted ‘v’ shapes, which stuck
up a bit like small hedgehog quills. These were arranged above the plait so that
they appeared as the wheat ears of the stalks below. The whole lot was egg washed
a couple of times to give it a good colour and gloss. The process is quite
lengthy and shouldn’t be done in a very hot room, as the dough would rise too
much.
I baked the bread normally, but did add some aluminium
foil to stop it burning. When it was finished I kept the oven on a low
temperature and kept the foil on and just let it continue baking for hours and
hours. I then finished it off in the dehumidifier in an attempt to thoroughly dry
it out. This is written a few months earlier than Harvest and I am attempting to
keep the sheaf to use then. I have found some silica gel crystals and will place
them in the cardboard box surrounding the loaf. I know a lot about keeping food
dry in this damp Lancashire climate of ours. I was a cake decorating teacher and
in past years had a few panics keeping specially iced cakes damp free when
humidity was high. Only breathable packaging should be used – cardboard is ideal.
Polythene would cause sweating and increase the risk of moulds forming.
If the harvest sheaf appears at the Harvest Festival I
have succeeded in keeping it long term, or I have made another one!!
I have thoroughly enjoyed the challenge of making this
sheaf and perhaps it will set me off breadmaking again.
Chris Hoban
P.S. The harvest sheaf did go mouldy very quickly despite
my efforts, but it is on record in the 2005 Church Calendar for the Harvest
month of September. Some of the flower arrangers used it for a harvest display.
Don’t forget to order your calendar copies soon!!
 ere small and we used to holiday in France. There the bread was so
fresh and crusty! When we came home from one particular holiday to the ‘cardboard
loaf’ I decided to buy no more and make my own bread. I used to buy sacks of
flour and store it in our caravan and I fresh yeast was purchased by the kilo.